


Introduction:
Hi guys, in this tutorial we’ll be using Fume FX with 3ds Max to make a cool fire effect. This is the first tutorial I have ever made so please forgive me for my mistakes.
Fume FX is basically a fluid dynamics simulator for 3ds Max. It can be used with geometry, particles or without any of these. It can be used to make a lot of cool effects like fire, gas, etc. This tutorial being of the first ones for Fume FX on the net, I’ll keep it simple.
So lets get started………
A large portion of this tutorial is similar to the Burning Teapot tutorial supplied with Fume FX. The geometry that I have used as the source of the fire is just a sphere that has been modified a little. Instead of making it yourself you can import the object named ‘bottom’ from Tut_04_finished.max which is supplied with Fume FX..
If you don’t have the file or you want to make it yourself, all you need to do is make a sphere. Apply a FFD 2x2x2 modifier. Then select the points at the top and drag them down till the sphere appears to be flat. Then rotate the object a little in the Y axis.
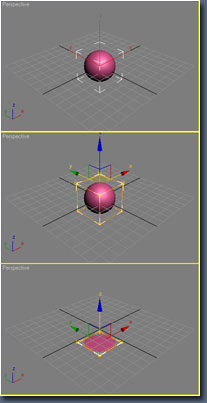
At the same time add an Omni light at the top right corner in the Front view port. The position and settings of the light will affect the appearance of the fire. In this case we’ll use the default settings.
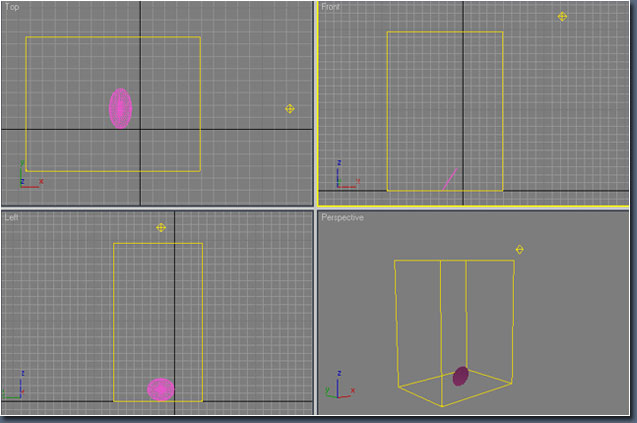
Once you’ve got your object in place we can start working with Fume FX. So go to the Create Command Panel, select Fume FX from the dropdown list, then click on Fume FX. From within the Top view port, draw out a Fume FX Grid as shown below to roughly match the size of the simulation area around your object.
Finally, open the FumeFX UI floating dialog by clicking the Open FumeFX UI from the Parameters rollout. Now under the General tab set an output path for the simulation. I’d suggest making a different folder for the output.
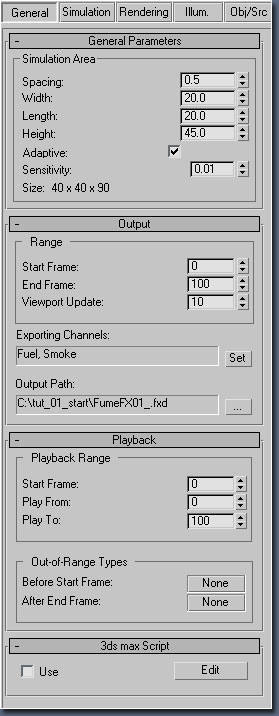
Next we’ll setup some parameters for the simulation. Still within the General tab, under the General Parameters change group of controls, change the Spacing value to 1.0 to provide a nice, dense volume of voxels to simulate with.
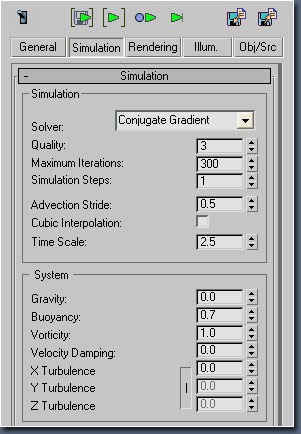
Now click on the Simulation tab within the FumeFX UI floating dialog.Under the Simulation group of controls, set the Quality value to 5, Maximum Iterations to 300 and Time Scale to 2.5. Within the System group of controls, set Gravity to 0, Buoyancy to 0.7 and Vorticity to 1.0.
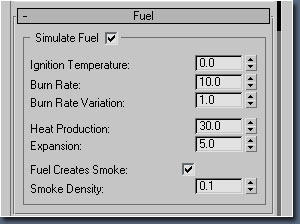
Now go to the Fuel rollout and set the following parameters:
- Ignition Temperature spinner to 0
- Burn Rate spinner to 10.0
- Burn Rate Variation spinner to 1.0
- Heat Production spinner to 30.0
- Expansion spinner to 5.0
After those are set, click on the Rendering tab in the FumeFX UI floating dialog.
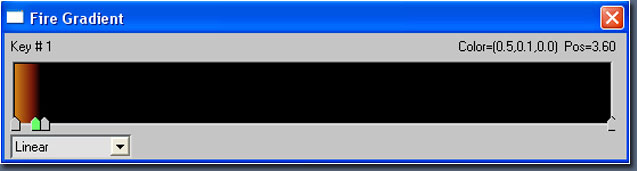
Go to the Fire rollout and then right-click on the Fire Gradient color swatch.
Choose Key Mode to turn it into a gradient. Change the Fire Gradient colors to roughly match the image below. This will give the fire a nice warm color. The values for the first to keys are:
1. R-229, G-155, B-25
2. R-119, G-23, B-10
Let the next two keys remain black.
Move further down the Rendering tab to the Smoke rollout and change the Smoke Opacity spinner value to 20.0.
Now go to the Illumination tab, click on the Pick button and then pick Omni01 as the light source.
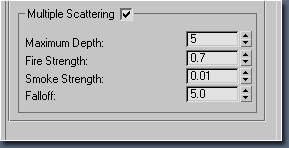
Scroll down and make sure that the Multiple Scattering checkbox is activated so we can manipulate how the lighting will blend into the smoke and fire.
Next, change the Multiple Scattering parameters as follows:
- Maximum Depth spinner to 5
- Fire Strength spinner to 0.7
- Smoke Strength spinner to 0.01
- Falloff spinner to 5.0
Now we must add our object in the Fume FX simulation system as the source of the fire.
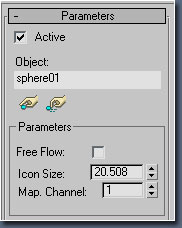
Within the Create Command Panel, go to the Helpers section; choose FumeFX from the dropdown menu, then select Object Src. The FumeFX Object Source simply informs the FumeFX simulation engine of an object you want as part of the sim, it doesn't need to reside within the FumeFX Grid volume therefore the position of the Object Source doesn’t affect the simulation. Within the FumeFX Object Source Parameters, click the Pick button, and then select sphere01 as your Object. Make sure it shows within the FumeFX Object Source as shown below.
Select the Obj/SRC tab in the FumeFX UI floating dialog and click the Pick button. In the 3ds Max view ports, select the FFX Object Src01 you created earlier as your Source.
With all of the objects / sources present, we need to make some final adjustments to the Object Source by applying an animated map to the Fuel and Temperature channels.
Make sure the FFX Object Src01 is highlighted within the list window.
Next, within the Temperature group of controls, change the Amount spinner to 650.0.
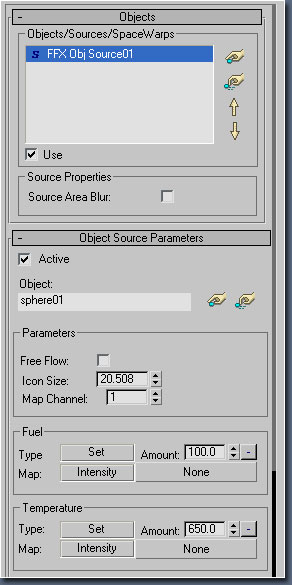
Now, for both the Fuel and Temperature groups of controls, click on the buttons labeled Disabled in each, and choose Source From Intensity from the pop-up list. This will activate the map slots for both.
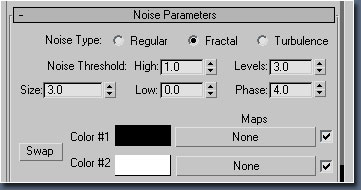
Click on the Map slot for the Fuel and choose Noise from the Material/Map browser. Open up the Material Editor and drop the map from the FumeFX UI floating dialog into one of the sample slots. Choose Instance.
Once the map is in the Material Editor, change the Noise Type from Regular to Fractal. Click on the Size spinner, and adjust its value to 3.0, then grab the Phase spinner and change it to 4.0.
Next we need to animate the map.
Turn on the Auto Key button and drag the time slider from frame 0 to frame 150. Back in the Material Editor; change the Phase spinner's value from 4.0 to 16.0.
NOTE: Make sure the animation track is linear and not bezier. You want to make sure that the noise animates evenly over time and doesn't start and end slowly.
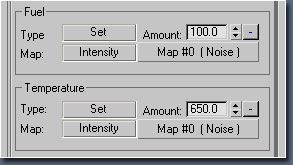
With the animation now in place, drag the map from the Material Editor back into the FumeFX UI and drop it into the Temperature Map slot. Choose Instance so that both maps work identically.
Now its time to run a test simulation.
Open up the preview window by clicking the Preview Window icon (first icon from the left).
To run the simulation, press the Start Simulation button (third icon from the left).

At this point, the simulation begins and you will see a progress dialog pop up.
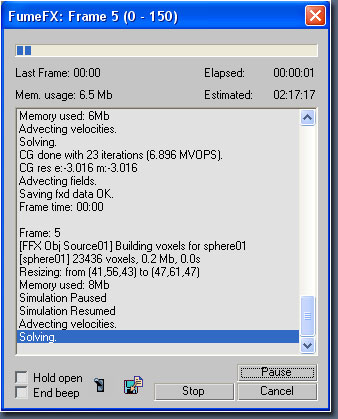
The time required to complete the simulation depends on the hardware you possess. The whole thing may take several minutes to complete.
If everything goes right you must have a result that looks similar to the image below.
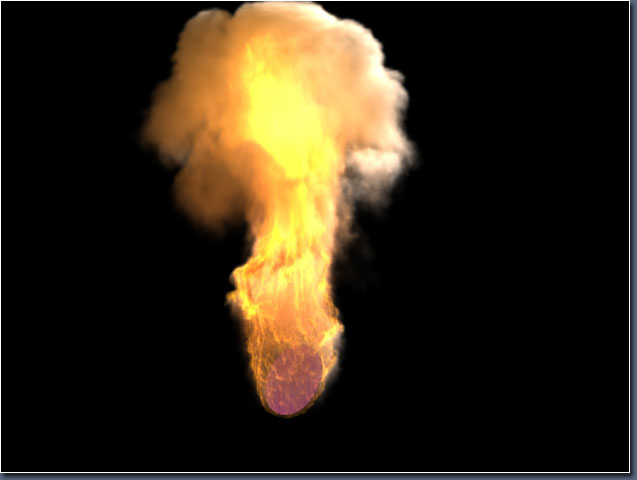
This concludes the tutorial. I hope you liked it. You can have different results by changing some parameters like deleting the lighting in the scene and changing the key colour. All you need to do is play with the settings.
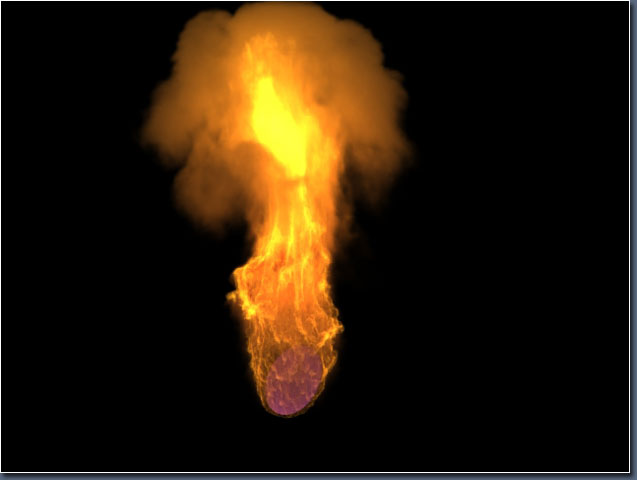
Here is an image of the same simulation without the Omni light.
You can have a look at a small video produced by the above simulation. To watch the video follow the link: https://www.youtube.com/watch?v=Hhg2ybItRQ0
